Intro
I’ve been wanting to record a cover of the song “No Suprises” by Radiohead for a while but with some special twist on the video. One of the ideas is to have the video recorded as one shot with a heavily pixelated filter to make it look a bit eerie. Couldn’t quite find anything that did the filter in the needed way, so I coded something to have it done.
CodeDev
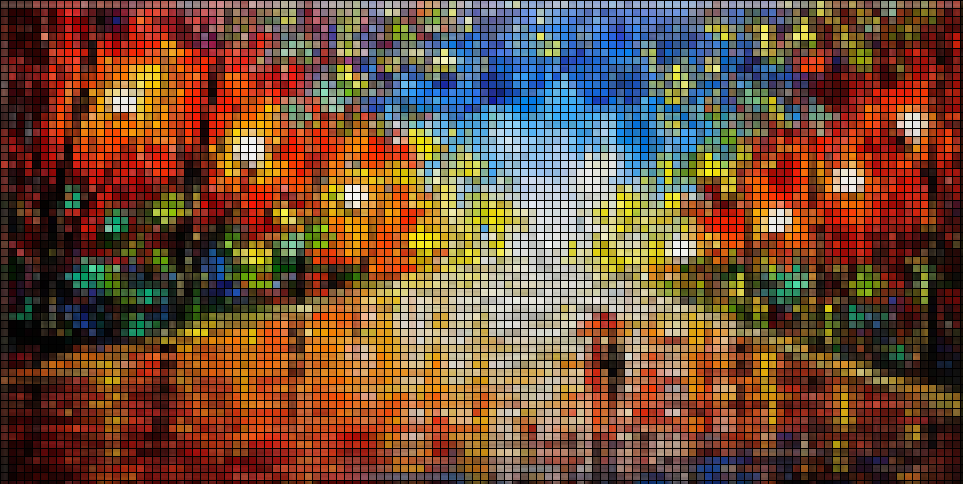
The main idea behind the algorithm is to divide the image into blocks, calculate the mean color value within each block, and then apply that color to all the pixels in that region.
For this demo, we’ll use a clip from the movie “Coco”:
Extract frames
First, we split the video into PNG frames upon which we will run our algorithm:
ffmpeg -i ./videoIn/coco.mp4 -vf fps=24 ./imageIn/out%04d.pngOnce the video is split, we start coding our python script. We start by loading our libraries:
Load libraries
import os
import cv2
import glob
import functions as fun
Setup our I/O paths along with the grid-size (in pixels):
(PATH_IN, PATH_OUT, GRID_SIZE, FRM, FRAME_COL) = (
    './imageIn/', './imageOut/',
    12, True, [0, 0, 0]
)
Cycle images
Then, we setup our iteration cycle, which loads all the PNG images in the desired folder and applies the filter to each one and exports the resulting image:
images = glob.glob(PATH_IN+'*.png')
images.sort()
for path in images:
    img = cv2.imread(path)
    name = path.split('/')[-1].split('.')[0]
    img = fun.pixelateImage(img, GRID_SIZE, True, (0, 0, 0), 1)
    # Export the resulting image
    filename = os.path.splitext(path)[0]
    cv2.imwrite(PATH_OUT+name+'.png', img)
Pixelate frames
The main function in this script is the pixelateImage contained in the functions.py file. This function ‘blurs’ the blocks with the mean value of the region and overlays a grid on the resulting image:
def pixelateImage(
            img, gridSize, gridOverlay=True,
            gridOverlayColor=(0, 0, 0), thickness=1
        ):
    # Run through the image and apply a mean filter function
    for r in range(0, img.shape[0], gridSize):
        for c in range(0, img.shape[1], gridSize):
            block = img[r:r+gridSize, c:c+gridSize, :]
            shp = block.shape
            blurred = cv2.blur(block, (shp[0]*2, shp[1]*2))
            img[r:r+gridSize, c:c+gridSize, :] = blurred
            # Could export here if the blocks were needed
    # Overlay the grid if requested
    if gridOverlay is True:
        # Add Gridlines
        height, width, channels = img.shape
        for x in range(0, width - 1, gridSize):
            cv2.line(
                    img, (x, 0), (x, height),
                    gridOverlayColor,
                    thickness, thickness
                )

        for x in range(0, height - 1, gridSize):
            cv2.line(
                    img, (0, x), (width, x),
                    gridOverlayColor,
                    thickness, thickness
                )

    return img
Re-assemble video
Once we’ve applied the filter to the images, we re-assemble the frames into a video:
ffmpeg -r 24 -i ./imageOut/out%04d.png -c:v libx264 -vf fps=24 -pix_fmt yuv420p ./videoOut/out.mp4
Code repo
- Repository: Github repo
- Dependencies: ffmpeg, opencv-python